I work with many different companies creating applications using Windows and Mac OS computers for all types of computers, tablets, and mobile devices. Because Fireworks is part of the Adobe Creative Suite, I’m often asked to show clients how to use it. Fireworks is a pretty good tool for rapidly building prototypes. You can create a basic visual look of your page, and the Hotspot feature makes it easy to show interaction. Fireworks is just missing some of the big picture planning items that I find helpful, like a site map, and the ability to make your prototype look like it is in “sketchy mode” – which are some of the things I love about Expression Blend as a prototyping tool.
Using Fireworks you can build navigational elements on a page, and then define that page as a master for all additional pages, thereby creating a working prototype. If you are interested in trying this, follow these steps:
- It is most important that you have your navigational map already defined before you start working in Fireworks. This means having post-its, sketches, whiteboard images…anything that defines what each page should be in the final site.
- In Fireworks choose File > New and set up a new document defining the size of your default web site or app.
- Build your navigational elements (buttons), add logos etc. on to a page using the Fireworks tools. Fireworks works much like Photoshop and Illustrator, the major difference is that it integrates vector and raster tools along with interactive items like hotspots in a way like no other application. If you have already created assets in Photoshop, or Illustrator you can open, place or paste the graphics right in Fireworks.
- Locate Windows > Pages, and then double-click to rename the initial page. If it is to be your start page change it to Index, or Home to make it easy to identify.
- Once you have renamed the page right-click on the page in the Pages panel and choose Set As Master Page from the contextual menu. You can edit this page by accessing it in the Pages panel at any time.

- Now click on the New Page icon in the lower-right of the Pages panel. Use your navigational map for this part. Note that each page comes in with the master page elements on them.
- Double-click on each page name and type in the appropriate name for that page. Now you can make the navigational elements clickable.
- Select the Master Page in the Pages panel and then right-click on one of your navigational elements. Select Insert Hotspot. A blue rectangle appears on top of the navigational element.
- In the Properties panel, select the Link drop down menu and select the page that you wish this navigational element to link to. Continue to do this with any other links.
- To test your site, choose File > Preview in Browser > Preview All Pages…
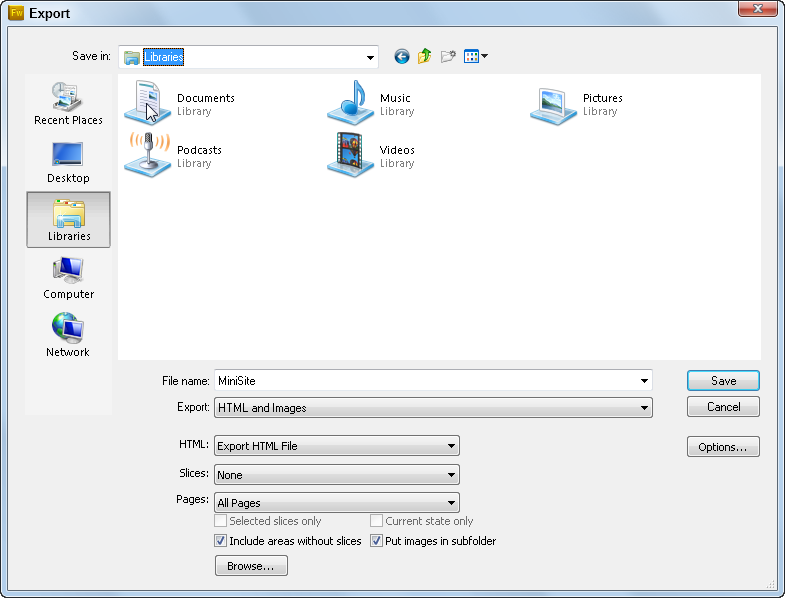
- If you want to send it to someone else choose File > Export and select HTML and Images, and All pages. Keep your images separate by checking Put images in subfolder option.

You can now send the folder with all pages to others to test your site. They need to only start the testing by clicking on the main (home page) Your hotspots will work as hyperlinks in the browser, taking them through the site.