I teach user experience design classes and often incorporate prototyping software tools as a part of my classes. I am frequently asked, “What is the best prototyping software?” The most popular tools, in no specific order, are SketchFlow, Visio, Balsamiq, PowerPoint, and Fireworks (if I left off your favorite – add a comment, I’d be happy to take a look at others). Which tool you prefer can depend on your platform (Mac vs. Windows), and how interactive you want your prototype to be. In the next two posts I am going to describe two of my favorites, Microsoft SketchFlow which is part of Microsoft Expression Blend, and Adobe Fireworks. I’ll start with an overview of Expression Blend SketchFlow by Microsoft.
My hands-down favorite for prototyping is Microsoft SketchFlow; which is included with Microsoft Expression Blend. It has the some major features that are important to me:
- SketchFlow Map to create navigational pages and test them before I waste any time creating content.
- Components: Offering me the opportunity to create custom (and working) controls that can be added to multiple pages. Components are dynamic which means that I can easily update my navigational elements and other items that I want to reuse, such as forms.
- Super interactive. I can create working lists of data, I can add state changes, animation, and even build my own custom buttons, sliders, toggle buttons and more, right in SketchFlow. I can also import native artwork directly from Adobe Illustrator or Photoshop, and turn them into working controls too.
The only drawback is that it only runs on the Windows platform. As a Mac user, I love this and several other apps so much that I run Bootcamp so I can run Windows 7 on my MacBook Pro. Let me explain why.
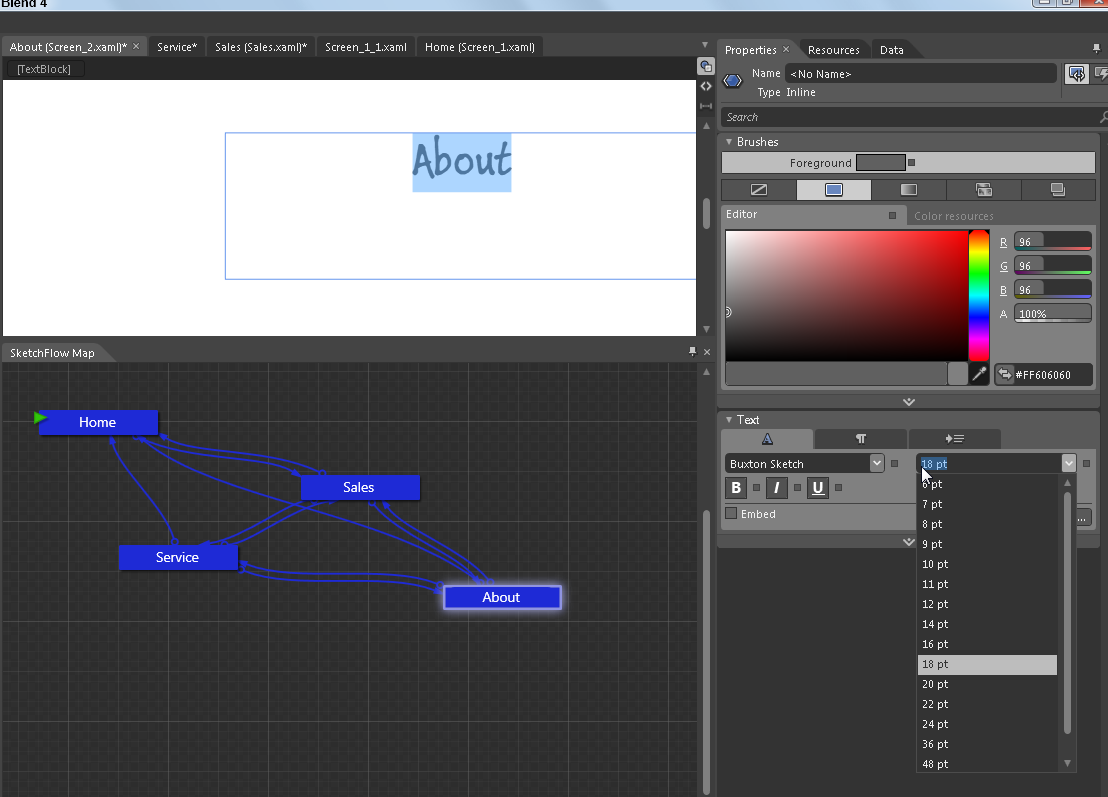
SketchFlow allows you to start your prototype with a panel called the SketchFlow Map. This panel allows you to easily create screens for your app, much like you would with post-its, or on a whiteboard. I frequently pull up SketchFlow in the early planning process and create screens as I am thinking about the navigational flow, and then simply putting one word on each page so that I can test the flow.
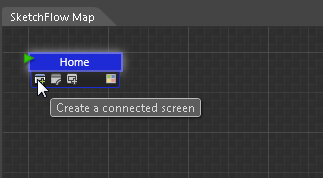
When you launch a new SketchFlow project in Expression Blend you automatically have one screen in the SketchFlow Map panel. You can double-click on it to assign a new name. Once you have renamed the initial screen, you can hover it to see additional options.
To create additional screens that are connected to this screen, simply click and drag the Create a connected screen option to another location in the SketchFlow Map. You continue to drag out screens until you feel that you have completed the base for your site or application.
If you want to connect your screens with each other, you can hover over any one of your screens and choose Create a connected screen and click and drag an arrow over to an existing page.
You can rename the screens by double-clicking on them and editing the screen name. You can also add words to the screens to describe what the screen content is to be, or even drop in .jpg’s, .png’s, native Illustrator or Photoshop files to help build a rough draft of your application.
Keep in mind that the Expression Blend tools that you use to create a SketchFlow document work much like Adobe Illustrator. This means that you can click and drag textboxes out to the page, rectangles and other primitive shapes and even pre-created controls such as buttons, ListBoxes, MediaPlayers and more. Anything that you create in SketchFlow is created in the “Sketchy” look, helping you to focus on navigation instead of font, color, and graphics. That can come later!
Once you build your map, you can press F5 at any time to see entire site appear in a SketchFlow Player in your browser. Keep in mind that you might have spent 15 minutes creating blank pages with words on them, but by using the Navigational panel in the SketchFlow player, you can already test your navigation.
Test your application in the SketchFlow Player by using the Navigate panel. You click on the pages to navigate to the various screens. If you hit a dead-end, you probably have some navigational issues. You can press Home in the SketchFlow player, but you will want to go back to SketchFlow and check your screen connections to fix the dead-end.
One you are ready to test the application further you can return to SketchFlow and select the Button tool from the Tools panel. Click and drag it to one of your screens, Type in a descriptive name for the button, and then right-click on it and choose Navigate to… and select one of your existing pages.
Once you have created an entire navigation control, you can select all the buttons and press Control G to group all the buttons together. Right-click and select Make Into Component Screen, name the new component and press OK. Note that now a green Component Screen is added to your SketchFlow Map panel.
To add this element to your other pages you can copy and paste it from the screen which it was created on, or click and drag the Connect to an existing screen option.
There are so many things that you can do with Expression blend SketchFlow that I can’t possibly fit them all in this post. I’ll add more tips and tricks relating to prototyping software in future posts. If you’re interested in prototyping training, wireframing training, ux training, or Fireworks training, or SketchFlow training contact AGI Training for classes and workshops on any of these topics.


Take a look at QuickPrōtō. Currently in beta, it will be coming soon to the marketplace.
It lets you create prototype apps from your phone then export the source for further development.
http://windowsphone.com/s?appid=e295802b-cb88-41dc-9d26-3dc76689a8bf
If you’d like a chance to beta test it, please e-mail your live id to beta [at] ultimatesacrificesoftware [dot] com.